
Understanding the Harris Bipod Model Number System
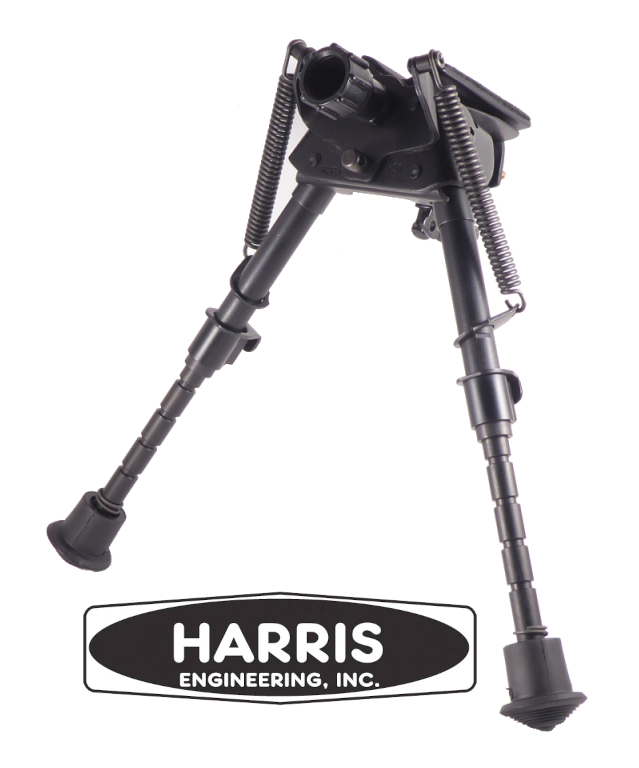 Harris bipods are known for their simple, durable design, but choosing the right model can be surprisingly confusing. A Harris bipod may have a model number such as S-BRM, 1A2-BRM, S-BR, S-LM, S-L2, or S-BRMP. To someone unfamiliar with the Harris lineup, those combinations can look almost arbitrary, but they are not.
Harris model numbers contain useful information about the bipod's base design, height range, leg adjustment system, mounting method, and other features. Once you understand what the different portions of the model number represent, it becomes much easier to compare Harris bipods and select the right one for a particular rifle and shooting position.
This guide explains the major Harris model-number conventions, including the difference between the 1A2 and S Series, what BR, L, and H indicate, what the M and 2 designations mean, and how the P designation identifies Picatinny-mounted models.
Table of Contents
- Harris Bipod Model Chart
- Harris Bipod Model Number Quick Reference
- Harris Bipod Model Numbers at a Glance
- 1A2 vs. S Series Harris Bipods
- 1A2 Series: Fixed Base
- S Series: Swivel or Pivoting Base
- 1A2 vs. S Series: Which Should You Choose?
- What Do BR, L and H Mean on a Harris Bipod?
- BR: Approximately 6-9 Inches
- L: Approximately 9-13 Inches
- H: Approximately 13.5-23 Inches
- What Does the "M" Mean on a Harris Bipod?
- Smooth Legs
- Notched Legs
- M Does Not Mean a Different Height
- What Does the "2" Mean on a Harris Bipod?
- Self-Leveling Does Not Mean the Bipod Automatically Makes the Rifle Level
- What Does the "P" Mean on a Harris Bipod?
- P Does Not Mean "Picatinny Adapter Required"
- How to Decode a Harris Bipod Model Number
- Example: Harris S-BRM
- Example: Harris S-BRMP
- Example: Harris S-L2
- Example: Harris 1A2-BRM
- How to Choose the Right Harris Bipod From the Model Number
- Step 1: Decide Whether You Need a Fixed or Swivel Base
- Step 2: Choose Your Height
- Choose BR if:
- Choose L if:
- Choose 25 if:
- Step 3: Choose Smooth, Notched or Self-Leveling Legs
- Self-Leveling Legs
- Step 4: Check Your Mounting System
- What Harris Bipod Should You Buy?
- General-Purpose 6-9 Inch Bipod
- Fixed 6-9 Inch Bipod
- Picatinny-Mounted 6-9 Inch Bipod
- Self-Leveling 6-9 Inch Bipod
- Taller 9-13 Inch Bipod
- Very Tall Bipod
- Harris Bipod Nomenclature: The Quick Reference
- Harris Bipod Model Numbers: Don't Buy by the Name Alone
- Related Harris Bipod Guides
- Final Takeaway
Harris Bipod Model Chart
"I don't want to know what all the letters mean, just tell me which Harris bipod has the features I want!"
Ok, we get it! The following chart explains the features of each Harris bipod model. Click on the model number to be taken to that bipod's product page.
| Harris Model | Base | Height | Leg System | Mounting |
|---|---|---|---|---|
| 1A2-BR | Fixed | 6-9" | Smooth | Sling swivel stud |
| 1A2-BRM | Fixed | 6-9" | Notched | Sling swivel stud |
| 1A2-BR2 | Fixed | 6-9" | Self-leveling | Sling swivel stud |
| 1A2-L | Fixed | 9-13" | Smooth | Sling swivel stud |
| 1A2-LM | Fixed | 9-13" | Notched | Sling swivel stud |
| 1A2-L2 | Fixed | 9-13" | Self-leveling | Sling swivel stud |
| 1A2-H | Fixed | 13.5-23" | Smooth | Sling swivel stud |
| 1A2-25 | Fixed | 13.5-27" | Smooth | Sling swivel stud |
| 1A2-25C | Fixed | 13.5-27" | Smooth | Sling swivel stud |
| S-BR | Swivel/pivoting | 6-9" | Smooth | Sling swivel stud |
| S-BRM | Swivel/pivoting | 6-9" | Notched | Sling swivel stud |
| S-BR2 | Swivel/pivoting | 6-9" | Self-leveling | Sling swivel stud |
| S-BRP | Swivel/pivoting | 6-9" | Smooth | Picatinny |
| S-BRMP | Swivel/pivoting | 6-9" | Notched | Picatinny |
| S-BR2P | Swivel/pivoting | 6-9" | Self-leveling | Picatinny |
| S-BR-MLOK | Swivel/pivoting | 6-9" | Smooth | M-LOK |
| S-BRM-MLOK | Swivel/pivoting | 6-9" | Notched | M-LOK |
| S-BR2-MLOK | Swivel/pivoting | 6-9" | Self-leveling | M-LOK |
| S-L | Swivel/pivoting | 9-13" | Smooth | Sling swivel stud |
| S-LM | Swivel/pivoting | 9-13" | Notched | Sling swivel stud |
| S-L2 | Swivel/pivoting | 9-13" | Self-leveling | Sling swivel stud |
| S-LP | Swivel/pivoting | 9-13" | Smooth | Picatinny |
| S-LMP | Swivel/pivoting | 9-13" | Notched | Picatinny |
| S-L2P | Swivel/pivoting | 9-13" | Self-leveling | Picatinny |
| S-L-MLOK | Swivel/pivoting | 9-13" | Smooth | M-LOK |
| S-LM-MLOK | Swivel/pivoting | 9-13" | Notched | M-LOK |
| S-L2-MLOK | Swivel/pivoting | 9-13" | Self-leveling | M-LOK |
| S-25 | Swivel/pivoting | 12-25" | Smooth | Sling swivel stud |
| S-25C | Swivel/pivoting | 13.5-27" | Smooth | Sling swivel stud |
| S-25CP | Swivel/pivoting | 13.5-27" | Smooth | Picatinny |
| S-25C-MLOK | Swivel/pivoting | 13.5-27" | Smooth | M-LOK |
Note: Harris model availability and naming can vary between current and older production runs.
Harris Bipod Model Number Quick Reference
| Designation | Meaning |
|---|---|
| 1A2 | Fixed/non-pivoting base |
| S | Series S swivel/pivoting base |
| BR | 6-9 inch height class |
| L | 9-13 inch height class |
| H | 13.5-23 inch height class |
| 25 | 13.5-27 inch height class |
| M | Notched legs |
| 2 | Self-leveling leg system |
| P | Picatinny mounting configuration |
| M-LOK | M-LOK mounting configuration |
| C | 25-series configuration designation |
Harris Bipod Model Numbers at a Glance
The easiest way to understand a Harris bipod model is to think of the model number as a collection of feature identifiers rather than one single code.
For example, S-BRM can be understood as:
- S = Series S swivel/pivoting base
- BR = 6-9 inch BR height class
- M = notched-leg configuration
Likewise, S-BRMP adds another important characteristic:
- S = Series S swivel/pivoting base
- BR = 6-9 inch height class
- M = notched legs
- P = Picatinny mounting
And S-L2 can be read as:
- S = Series S swivel/pivoting base
- L = 9-13 inch height class
- 2 = self-leveling leg system
This way of looking at the model numbers is much more useful than memorizing individual products.
1A2 vs. S Series Harris Bipods
One of the most important distinctions in the Harris lineup is the difference between the Harris 1A2 bipods and the Harris S bipods. The two families can have similar height ranges and leg configurations, but their bases behave differently. For a more detailed comparison of 1A2 versus S Series Harris Bipods, see Harris Swivel vs. Fixed Bipods: Do You Need a Canting Bipod?
1A2 Series: Fixed Base
A 1A2 Harris bipod has a solid, non-pivoting base. Once the bipod is attached to the rifle, the base does not allow the rifle to rotate from side to side through the bipod's mounting mechanism. For example, a 1A2-BRM is the fixed-base counterpart to the swivel-base S-BRM. This type of bipod can be a good choice when the rifle is normally used from a relatively level surface and you prefer a fixed mount between the rifle and bipod. A fixed mount can be particularly attractive for:
- Bench shooting
- Flat shooting surfaces
- Shooters who do not need cant adjustment
- Applications where simplicity is the priority
S Series: Swivel or Pivoting Base
The S Series adds a pivoting/swiveling base that allows the rifle to tilt from side to side. This is useful when the ground beneath the two bipod legs is not perfectly level. Instead of requiring both legs and the rifle to sit on precisely the same plane, the S Series allows the rifle to be leveled independently of the bipod's contact with the ground.
That makes the S Series particularly useful for field shooting. For example, the Harris S-BRM combines the S Series pivoting base with the 6-9 inch BR height and notched legs.
1A2 vs. S Series: Which Should You Choose?
If you regularly shoot from uneven terrain, the S Series is generally the more versatile choice because the pivoting base can compensate for differences in the ground beneath the legs. If you primarily shoot from a flat bench and do not need that adjustment, a 1A2 model may provide everything you need. This distinction is one of the first things to determine when comparing Harris bipods.
What Do BR, L and H Mean on a Harris Bipod?
The letters BR, L, and H identify different height classes. The exact model lineup has changed over time, but these designations are commonly associated with progressively taller Harris bipods.
BR: Approximately 6-9 Inches
The BR models are the compact 6-9 inch class. Examples include:
The 6-9 inch range is popular because it provides a relatively low shooting position without making the bipod too tall. A 6-9 inch Harris is commonly considered for:
- Bench shooting
- Prone shooting
- Precision rifle setups
- Hunting from a low position
- General-purpose rifle use
The S-BRM, for example, is a 6-9 inch notched-leg swivel model.
L: Approximately 9-13 Inches
The L models move into the 9-13 inch height range. Common examples include:
The additional height can be useful when the shooter needs more clearance beneath the rifle or when a slightly taller shooting position is preferred. The tradeoff is that a taller bipod can be less compact and may raise the rifle higher above the ground than necessary for a low prone position.
For that reason, the best height is not simply a matter of choosing the "bigger" bipod. It depends on the rifle, shooting position, terrain, and the shooter's preferred body position. The S-L2, for example, is a 9-13 inch swivel model with self-leveling legs.
25: Approximately 13.5-23 Inches
The 25 models are substantially taller. A common example is the 1A2-25, which extends from approximately 13.5 to 27 inches and uses a fixed base with smooth legs. This height range is intended for shooting positions where a short bipod would not provide enough elevation, including applications involving:
- Sitting positions
- Taller field shooting positions
- Uneven terrain
- Situations where additional ground clearance is needed
A 13.5-27 inch bipod is a very different tool from a 6-9 inch BR model. Choosing between them should therefore start with the shooting position rather than the rifle itself.
What Does the "M" Mean on a Harris Bipod?
The M designation identifies the notched-leg configuration used on Harris BR and L models. For example:
- S-BR has smooth legs.
- S-BRM has notched legs.
The difference is important because the two systems adjust differently. For a more detailed explanation, see Harris Notched vs. Smooth Legs: What's the Difference?
Smooth Legs
Smooth-leg Harris bipods allow the leg extension to be positioned continuously within its adjustment range. This gives the shooter fine control over the height of each leg.
Notched Legs
Notched-leg models have predetermined adjustment points along the leg extension. The legs can be rapidly extended and adjusted to the available positions. This is one reason the S-BRM is so commonly recommended by shooters: it combines the swivel base, compact 6-9 inch height range and quick-adjust notched legs.
M Does Not Mean a Different Height
The M does not mean "medium" and it does not identify a different height range. Compare:
- S-BR: 6-9 inches, smooth legs
- S-BRM: 6-9 inches, notched legs
The height class remains BR. The M changes the leg adjustment system. Likewise:
- S-L: 9-13 inches, smooth legs
- S-LM: 9-13 inches, notched legs
What Does the "2" Mean on a Harris Bipod?
The 2 designation identifies Harris's self-leveling leg configuration on models such as the S-BR2, 1A2-BR2, and S-L2. This is different from the traditional smooth or notched leg designs. A self-leveling Harris bipod allows the shooter to adjust the leg lengths while the bipod is supporting the rifle and then lock the adjustment into position.
For example, the S-BR2 combines:
- Series S rotating/pivoting base
- BR 6-9 inch height
- Self-leveling leg mechanism
The corresponding fixed-base version is the 1A2-BR2.
Self-Leveling Does Not Mean the Bipod Automatically Makes the Rifle Level
This distinction is worth emphasizing because the term can be misleading. The self-leveling mechanism does not mean that you put the bipod on an uneven surface and the rifle automatically becomes perfectly level. Instead, the mechanism makes it easier to independently adjust the two legs and establish the desired rifle position. This is a good example of why Harris terminology can be confusing. The "2" designation tells you that the bipod uses the self-leveling leg system, but you still need to set the rifle correctly.
What Does the "P" Mean on a Harris Bipod?
The P designation identifies a Picatinny-mounted configuration in model numbers such as S-BRMP. The standard Harris bipod attachment system is designed around a sling swivel stud. A P-model provides direct attachment to a Picatinny rail instead. For example:
- S-BRM is the familiar swivel-base, 6-9 inch, notched-leg configuration.
- S-BRMP adds a Picatinny rail mounting interface. The result is a 6-9 inch swivel Harris bipod with notched legs and Picatinny mounting.
P Does Not Mean "Picatinny Adapter Required"
A common source of confusion is the difference between a standard Harris bipod plus an adapter and a factory-configured P model. A standard S-BRM is designed to attach to the sling-swivel-stud present on the forend of most rifle stocks. An S-BRMP is configured for to attach to a lower Picatinny rail. If your rifle has a Picatinny rail, make sure you understand which configuration you are buying before ordering.
If your rifle uses M-LOK or another mounting system, do not assume that a P model will fit. Instead, determine whether the specific Harris model is available in that mounting configuration or whether you need an adapter. Our Harris bipod mounting guide explains the differences between sling stud, Picatinny, M-LOK and ARCA mounting.
For more information about the different Harris mounting options, see How to Mount a Harris Bipod: Sling Stud, Picatinny, M-LOK and ARCA Explained.
How to Decode a Harris Bipod Model Number
Once you understand the major designations, the model number becomes much easier to read.
Example: Harris S-BRM
- S: swivel/pivoting base
- BR: 6-9 inch height class
- M: notched legs
The result is A 6-9 inch Harris swivel bipod with notched legs. This is one of the most useful Harris configurations for someone looking for a general-purpose bipod.
Example: Harris S-BRMP
Now add the P: S-BRMP
- S: swivel/pivoting base
- BR: 6-9 inch height class
- M: notched legs
- P: Picatinny mounting
The result is a 6-9 inch swivel Harris bipod with notched legs and direct Picatinny mounting. If you are trying to attach a Harris bipod to a rifle with a Picatinny rail, this is an important model to know.
Example: Harris S-L2
- S: swivel/pivoting base
- L: 9-13 inch height class
- 2: self-leveling legs
The result is a 9-13 inch swivel Harris bipod with self-leveling legs. This model makes sense when you want the additional height of an L-series bipod and prefer the adjustment system used by Harris's self-leveling models.
Example: Harris 1A2-BRM
Now remove the S and substitute 1A2:
- 1A2: fixed/non-pivoting base
- BR: 6-9 inch height class
- M: notched legs
The result is a fixed-base, 6-9 inch Harris bipod with notched legs. Compare it with the S-BRM. The two models have the same basic height and leg configuration. The major difference is the base.
- 1A2-BRM has a fixed mount.
- S-BRM has a swivel/pivoting mount.
How to Choose the Right Harris Bipod From the Model Number
Instead of memorizing every Harris model, work through the model number one feature at a time.
Step 1: Decide Whether You Need a Fixed or Swivel Base
If you normally shoot from a flat bench, a fixed 1A2 model may be sufficient. If you regularly shoot from uneven terrain, a Series S model provides additional flexibility because the base can pivot. For a general-purpose field rifle, the S Series is often the more versatile choice.
For a more detailed discussion of this choice, see Harris Swivel vs. Fixed Bipods: Do You Need a Canting Bipod?
Step 2: Choose Your Height
Next, determine how high the bipod needs to be.
Choose BR if:
- You primarily shoot prone or from a bench.
- You want a low-profile bipod.
- You want to minimize the rifle's height above the ground.
- A 6-9 inch range suits your stock and shooting position.
Choose L if:
- You need more clearance.
- You prefer a somewhat taller prone position.
- You regularly encounter grass or uneven terrain.
- You want a 9-13 inch adjustment range.
Choose 25 if:
- You shoot from a seated position.
- You need substantially more height.
- You routinely shoot over taller vegetation or uneven terrain.
- A 13.5-23 inch range is appropriate for your shooting position.
The important thing is to choose the height based on where you shoot, not simply the size of the rifle.
Step 3: Choose Smooth, Notched or Self-Leveling Legs
This is the next major decision.
- Smooth Legs: Choose smooth legs when fine, continuous adjustment is more important than rapid preset adjustment.
- Notched Legs: Choose notched legs when you want quick, repeatable height adjustments.
The M designation identifies this configuration. See Harris Notched vs. Smooth Legs: What's the Difference? for a more detailed comparison.
Self-Leveling Legs
Choose the 2 configuration when you want the specialized self-leveling adjustment system and the ability to adjust the legs while maintaining your shooting position.
Step 4: Check Your Mounting System
Finally, determine how the bipod needs to attach to the rifle.
- If your rifle has a conventional sling swivel stud, the standard Harris configuration may be appropriate.
- If the rifle has a Picatinny rail and you want the bipod to attach directly to it, look for a P model such as the S-BRMP.
- If your rifle uses M-LOK or another mounting system, do not assume that a P model will fit. Instead, determine whether the specific Harris model is available in that mounting configuration or whether you need an adapter.
- See How to Mount a Harris Bipod: Sling Stud, Picatinny, M-LOK and ARCA Explained for more information.
What Harris Bipod Should You Buy?
If you are starting with Harris bipods and want to narrow the selection quickly, these are useful configurations to understand.
General-Purpose 6-9 Inch Bipod
This configuration combines a swivel base, 6-9 inch height and notched legs. It is a strong starting point for someone who wants a versatile Harris bipod without needing an unusually tall setup.
Fixed 6-9 Inch Bipod
Choose this configuration if you want the same general height and notched-leg concept but do not need the pivoting S Series base.
Picatinny-Mounted 6-9 Inch Bipod
This combines the S Series swivel base and notched BR legs with direct Picatinny attachment.
Self-Leveling 6-9 Inch Bipod
This is the S Series version with self-leveling legs. The corresponding fixed-base model is 1A2-BR2.
Taller 9-13 Inch Bipod
Choose between notched and self-leveling leg systems depending on how you want to adjust the bipod.
Very Tall Bipod
The H model provides a 13.5-23 inch range and is intended for applications where a conventional 6-9 or 9-13 inch bipod is not tall enough.
Harris Bipod Nomenclature: The Quick Reference
When you see a Harris model number, look for these components:
| Designation | Meaning |
|---|---|
| 1A2 | Fixed/non-pivoting base |
| S | Series S swivel/pivoting base |
| BR | 6-9 inch height class |
| L | 9-13 inch height class |
| H | 13.5-23 inch height class |
| M | Notched legs |
| 2 | Self-leveling leg system |
| P | Picatinny mounting configuration |
| M-LOK | M-LOK mounting configuration |
The most useful trick is to read the model from left to right.
For example:
S-BRMP
means:
S + BR + M + P
or:
Swivel base + 6-9 inch height + notched legs + Picatinny mount.
Once you see Harris model numbers this way, the lineup becomes considerably easier to navigate.
Harris Bipod Model Numbers: Don't Buy by the Name Alone
The biggest mistake when shopping for a Harris bipod is to search only for "Harris 6-9 bipod" or "Harris swivel bipod." Several models can share the same basic height while having very different mounting systems or leg-adjustment mechanisms. For example:
- S-BR and S-BRM are both 6-9 inch swivel models, but their leg systems differ.
- S-BRM and S-BRMP share the same basic swivel, notched and 6-9 inch configuration, but their mounting interfaces differ.
- S-BRM and 1A2-BRM have similar height and leg configurations, but one has a pivoting base and the other has a fixed base.
- S-BR2 and S-BRM are both 6-9 inch S Series bipods, but the leg-adjustment systems are different.
That is why the model number matters.
Instead of asking only, "Which Harris bipod is 6-9 inches?" ask:
- Do I need a fixed or swivel base?
- Do I want smooth, notched or self-leveling legs?
- Do I need a sling-stud or Picatinny attachment?
- What height range fits my shooting position?
Once those four questions are answered, the Harris model number usually becomes much easier to identify.
Related Harris Bipod Guides
For more information about choosing and using Harris bipods, see:
- Harris Bipod Model Numbers Explained
- Harris Notched vs. Smooth Legs: What's the Difference?
- Harris Swivel vs. Fixed Bipods: Do You Need a Canting Bipod?
- How to Mount a Harris Bipod: Sling Stud, Picatinny, M-LOK and ARCA Explained
Final Takeaway
Harris bipod model numbers are easier to understand when they are treated as a combination of features rather than a collection of arbitrary letters.
The first part tells you about the base, the middle portion generally identifies the height class, and the additional letters or numbers describe important differences such as notched legs, self-leveling legs or Picatinny mounting.