These instructions are written for the SiteLite SL-500 Laser Boresighter. The process of boresighting a rifle scope with a chamber laser is similar, if you ignore the product-specific instructions. If you are not using a SiteLite SL-500, your results may vary.
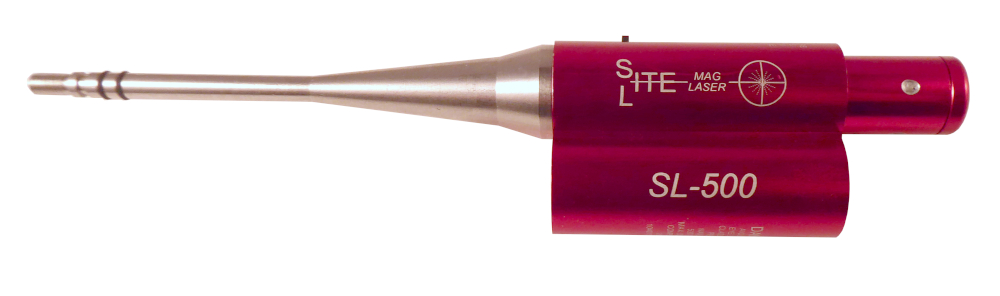
When installing a scope on a rifle, it must be aligned with the rifle's bore to achieve precision accuracy. Laser boresights have made this process very easy in recent years. The SiteLite SL-500 laser boresight projects a laser beam onto a calibrated target for superior boresighting accuracy, which is a necessary step of properly sighting in a rifle scope. The SiteLite SL-500 is ideal for use with conventional and red dot scopes, as well as open sights. The SL-500 fits most calibers of rifles, shotguns, and muzzleloaders.
Boresighting is not the end of the process of sighting in a rifle or pistol. In fact, it is usually only the first step. Laser boresights are meant to put your rifle or pistol "on paper," meaning close enough to be dialed in at range. Once you have followed this guide, you will have to fine tune your scope alignment at a shooting range with live ammunition.
WARNING!
Unload your firearm before using the SL-500 laser boresight! Physically check your firearm, do not assume it is unloaded!
Laser Safety Precautions
The SL-500 laser boresight uses a Class IIIa laser with a 530-670 +/- 10NM wavelength, and a maximum output of 5.0mW. It is safe to use in normal operation described in these instructions. The SL-500 has warning labels in compliance with applicable regulations. Avoid direct eye exposure. Do not look directly into the laser. Use of controls or adjustments or performance of procedures other than those specified in his guide may result in hazardous radiation exposure. Don't mess around with the laser.
Note that the battery cap threads and housing may develop an invisible oxidation layer over time, therefore the threads may need to be sanded (very lightly) to remove the aluminum oxidization. It is recommended to use steel wool or a pencil eraser to remove this oxidation. This will ensure a good electrical connection for the laser to function properly. Check this first if the laser does not function properly.
Muzzle Adapter Instructions
The muzzle adapters use various size o-rings to align the boresighter within the center of different caliber bores. Refer to the "O-ring to Caliber Selection Chart" for the proper o-ring. The proper o-ring should enter the bore with light to moderate drag when lubricated. The barrel insert (without a screw-on muzzle adapter) should be used for all calibers from .22 to 7mm (.284 cal). O-rings for these calibers are put in position "B" on the barrel insert.
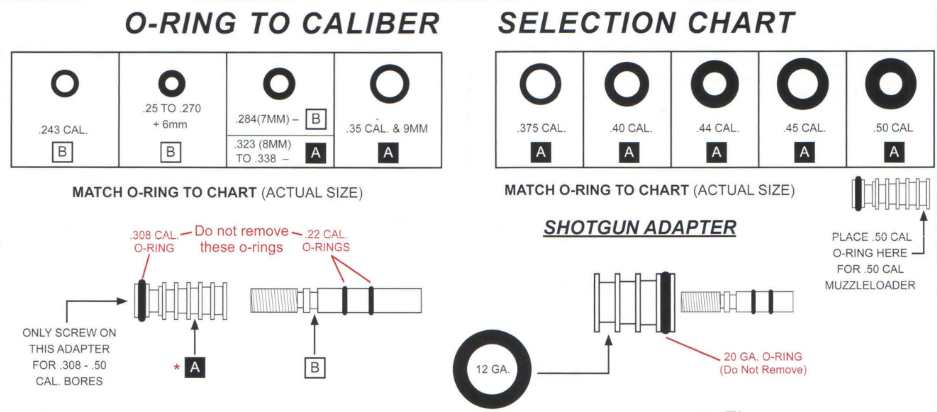
 The small screw-on muzzle adapter is used for all calibers from .308 to .50 caliber. O-rings for these calibers are put in position A on the muzzle adapter. The adapter has additional o-ring grooves that are not referenced on the chart. These grooves are graduated in size and are provided to compensate for varying tolerances in bores and calibers. Use these grooves as required to ensure that the o-ring enters the bore with the proper drag. Always lubricate the o-ring with silicone grease or vaseline before inserting into the bore.
Note: The barrel insert and muzzle adapters were conveniently designed so that the .308 and .22 caliber o-rings never have to be removed, since those are the two most popular calibers in use. The .308 o-ring is used for .30-30, .30-06, .300 Win Mag, .300 WSM, .300 Savage, .308 Win, and 7.62mm bores. The .22 caliber o-ring is used for .22, .222, .223, .22-250, and 5.56mm bores.
The shotgun muzzle adapter fits 20 gauge and 12 gauge shotgun bores. The 20 gauge o-ring does not have to be removed. The 12 gauge o-ring is put in position "C". The other grooves are used to compensate for varying tolerance bores.
Leveling the Riflescope Reticle
The SiteLite SL-500 laser boresighter includes the SRL-100 Scope Reticle Leveler. The SRL-100 converts the SL-500 laser boresighter into an extremely accurate scope reticle leveler. It is designed to precisely level your scope crosshair prior to boresighting. The adapter uses a high quality glass lens and simply slips over the laser module housing to change the laser spot into a precise laser line.
-
Secure the rifle in a gun vise and adjust the butt of the stock so it is vertical. Vertical alignment is a preliminary adjustment at this time, and does not require precise accuracy.
-
Loosen the scope rings only until you can start to rotate the scope.
-
Insert the SL-500 boresighter into the muzzle, using the correct o-ring.
-
Slip on the SRL-100 adapter and rotate slightly until it just contacts the boresighter's housing. Do not use any force after contacting the housing.
-
Place the SRL-100 target on a wall between 15 and 25 feet from the muzzle and level the target with the built-in bubble level.
-
Turn on the laser. Hold the boresighter housing and turn the adapter until the laser line is vertical and aligned with the crosshairs on the target.
-
Rotate the scope and adjust the windage to align the crosshair with the laser line.
-
Pick up the rifle and aim it, using your normal shooting stance. Note the position of the crosshairs in relation to the laser line. If necessary, readjust the crosshairs to ensure that they are vertical and level in your shooting position. Every shooter holds their firearm in a slightly different position, so it is important to make this check.
-
Tighten the scope ringsg, ensuring that the scope does not rotate or move from its level position.
How to Boresight Your Rifle or Pistol
You will need:
- The SiteLite SL-500 laser boresight
- A target. Standard rifle zero or bullseye targets are acceptable. The SL-500 includes a manufacturer-specific laser target.
- A gun vice or "lead sled." Your rifle needs to remain stable during the boresighting process.
- Somewhere with approximately 10 yards/25 feet of space between the rifle and target.
Place the target 25 feet from the muzzle. The firearm must be secured and clamped into position.
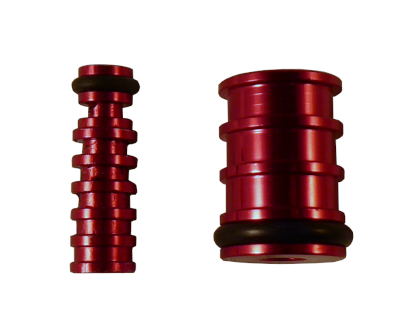
There are four pre-installed o-rings included with the SL-500 that should not be removed. Two .22 caliber o-rings are present on the barrel insert of the boresight. One .308 caliber o-ring is installed on the small muzzle adapter. One 20 gauge o-ring is installed on the large barrel adapter.
-
Install the proper o-ring and screw on the muzzle adapter, as required (see Muzzle Adapter Instructions above). Lubricate the o-ring with Vaseline or silicone lubricant before inserting it into the barrel. Do not use gun oil - some oils will swell and deteriorate the o-ring.
-
Insert the boresight all the way into the muzzle, with the arrow aligned with the top center of the barrel. The lubricated o-ring should insert with a light drag. Due to the varying tolerances in different bores and calibers, the o-ring can be put in any of the grooves for a better fit. If the o-ring is too loose in the bore, then move the o-ring to the next largest groove. This will enlarge the o-ring slightly for a tighter fit. If it is too tight in the bore, move the o-ring to the next smallest groove. Remember to always lubricate the o-ring with silicone grease or vaseline before inserting into the bore.
-
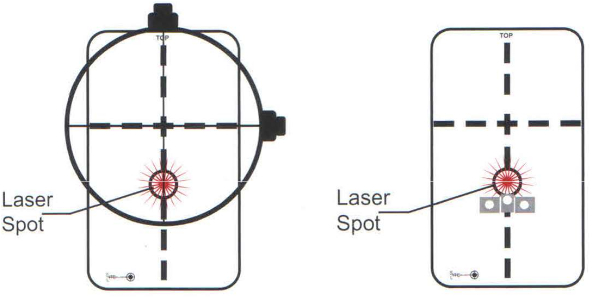
Set the scope at its lowest power and switch on the boresight. Adjust the position of the firearm to center the laser within the "Laser Target" located below the dotted line crosshair on the target. The laser spot projected on the target will normally range in size from 1/2" to 3/4" in diameter.
-
Ensure that the firearm does not move and that the laser remains centered in the target while making adjustments. Adjust the scope crosshairs to align with the target.
-
Complete sighting in the firearm at the range, taking the first shots at no more than 50 yards to make your initial adjustments.
Remember, boresighting is only the first step in sighting in a rifle scope. Put in plenty of range time to dial in your firearm to ensure that your first shot always lands where it's supposed to.
Boresighting Tips
 The target provided with the SiteLite SL-500 laser boresight is calibrated for a normal scope height of 1.5" above the bore of the barrel (center of bore to center of scope). For substantially higher mounted scopes, you must mark a new elevation line above the horizontal dotted line on the target to compensate for the difference. For example, if your scope is 2.5" high center-to-center, you would mark a line 1 inch above the dotted line and adjust your scope elevation to it. This should not be necessary for most shooters with low/medium/high rings.
Handguns with red dot scopes or lasers, to be sighted in at close ranges of 25 to 75 feet, can be boresighted by placing the boresighter laser dot on any object between 25 and 75 feet and aligning the red dot or laser with the boresighter laser dot.
Short barreled handguns are usually not compatible with laser boresighters. Laser sights on short barreled handguns can be easily aimed by simply aiming the laser at a light surface about 25 feet away and adjusting the laser spot to align with the top of the front sight. This method is very accurate for short barreled handguns and does not require a boresighter. This method can also be used for red dot sights up to 75 feet.
SiteLite unconditionally guarantees that their laser boresighters are more accurate than any other boresighter. It is important to take your first shots at 50 yards because of many factors affecting boresighting accuracy such as parallax, bullet spin, variable ballistics, etc. You should always sight in your firearm at a range after boresighting to compensate for these factors, regardless of any boresighter you use.
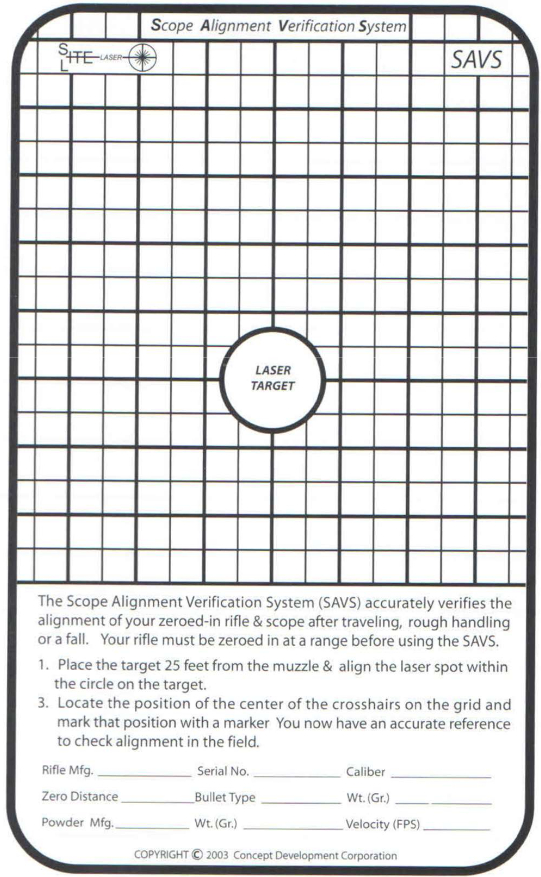
Scope Alignment Verification System (SAVS)
The Scope Alignment Verification System target accurately verifies the alignment of your zeroed-in rifle scope after traveling, rough handling, or a fall. Your rifle must be zeroed-in before using the SAVS.
-
Place the target 25 feet from the muzzle and align the laser spot within the circle of the target.
-
Locate the position of the center of the crosshairs on the grid and mark that position. The center of your crosshair may be slightly off-center at 25 feet due to bullet spin from barrel rifling. You now have an accurate reference to check against alignment in the field.